
Well, hello friends! Coming at you today with a fun DIY! I am so excited to share how to make a DIY vinyl stencil chalkboard sign. I’ve always had a love for vintage signs, so when I saw this amazing one from my friend Jess at Uncommon Farmhouse, I fell in love. I mean, AMMMAZING, right?? My goal was to find or make something similar but a little more personal to me. I stumbled upon a large vintage chalkboard last fall and immediately knew that is what I wanted to do with it. I worked with Chelons Chatty Walls on this project and she blew me away with her design. She took my idea and put it all together for me. So, let me show you the process of making a DIY vinyl stencil sign.
Materials:
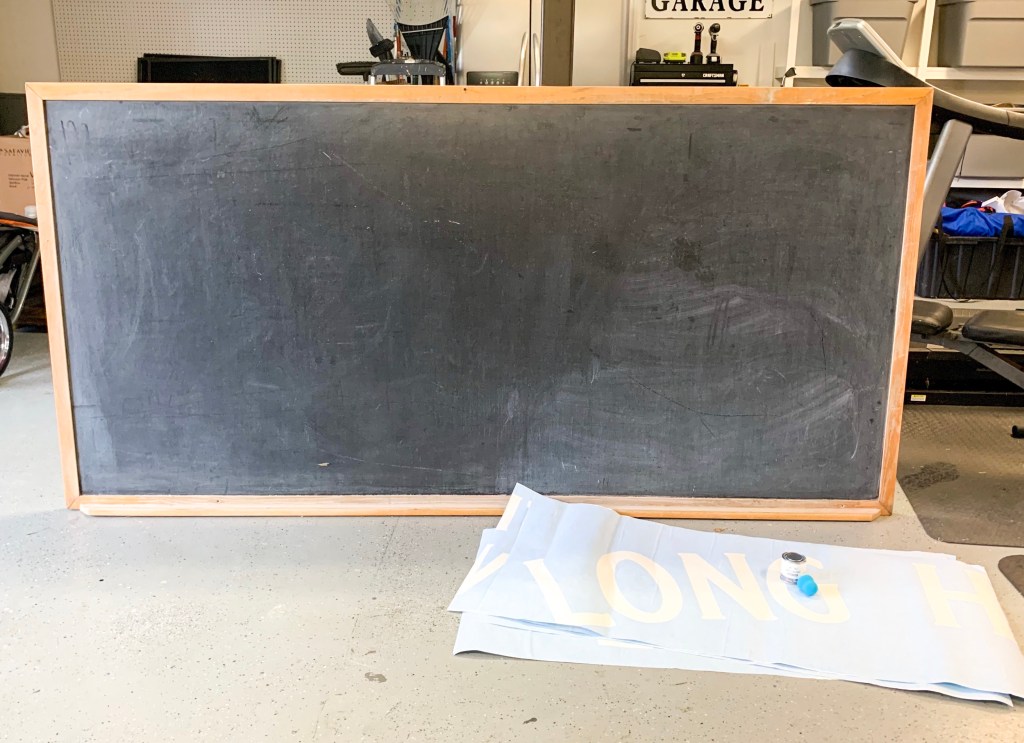
- Chalkboard or Wood Sign
- Stencil (Vinyl Paint Mask)
- Paint (I used Annie Sloan Original)
- Paint brush
- Sandpaper
Step 1- Lay Out Your Stencil

First, lay out the vinyl paint mask to make sure it is lined up. Luckily, mine fit perfectly on the board which made it super easy.
Step 2- Peel and Smooth

Each vinyl stencil had a top and bottom cover that needed to be removed. Start by removing the bottom and carefully sticking the corners and sides down, then peel back carefully. After we removed the bottom and stuck it on the board, we smoothed out any bubbles that might be left behind.

Next, we removed the top layer. Since my board was so large, it was a two person job to stick and peel each section. We did top left, then right, then bottom left and right.

Here is what it looks like after the entire vinyl mask is peeled off.
Step 3- Paint Inside The Letters

Now it’s time to paint. I did a thin layer first and then went back and did a second layer. My goal was to make it look like an authentic vintage sign, so I kept the paint pretty thin and even a little uneven. My goal was to make my sign look imperfect.
Step 4- Pull Off the Contact Paper and Distress

After the paint was dry, I peeled off the vinyl mask. The last step was to distress my letters. Of course this step is optional, but since I wanted my sign to look old, I made sure to distress it pretty well.
Vintage Stencil Chalkboard Sign Reveal
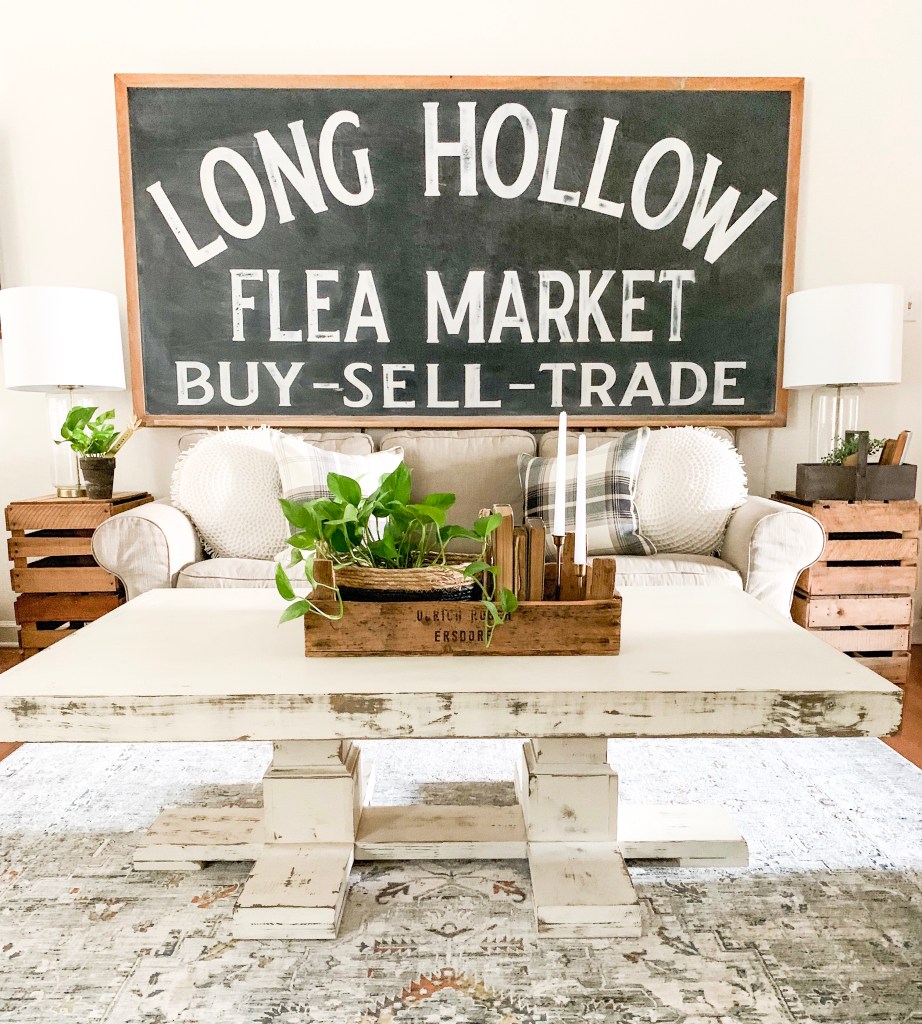
Here it is! Go big or go home, right?! My goal was to make a cool statement piece, and I believe I accomplished that with this sign. Not going to lie, it was a little hard to get used to, but I love it how it looks in my living room.

Besides the distressing of the letters, I also wiped it down with a paper towel with the access chalk paint that was left over from distressing it. I think it gave the sign a really awesome whitewashed look. It also added to the vintage look that I was going for.


I paired the sign with these clear seeded glass and gold lamps which I LOVE. They are simple and so beautiful. I think they also add a vintage vibe that pair so great with the sign.

The last piece to the look was this new vintage inspired rug from Boutique Rugs. I am so in love with this gorgeous rug. Look for a blog post with more details about this rug coming very soon!

This DIY vinyl stencil chalkboard sign turned out even better than I had imagined. I enjoyed this project so much, and I honestly can’t wait until my next stencil project. I hope you enjoyed learning how I made it and let me know what you think. Thanks for stopping by the blog today!





Mission accomplished! Love it!
So happy you love it! Thank you!!
Eek! it turned out amazing!!!
So sweet! Thank you so much, Sarah!!